Worldox provides powerful search capabilities, so you can find files and email messages quickly. Depending on your access rights, you may be able to save, edit and even delete search forms as well. For instructions, use the links below.
Note: Customized search forms can saved and managed for document/file searching, not for email searching. Worldox uses only one, standard form to search for email.
• Designate a default search form or view
• Check, set search preferences
![]()
Tip:
To create and save a new search, start with an old one.
Just open any search form, as long as it's not a view. (Here's
how to tell the difference.) Then make whatever
changes are needed; to save, click Options
|
Assuming the necessary access rights, you always have the option to save a search just before starting the search. (For details, see Step 5 in these instructions.)
You don't have to search in order to create a search template. All you need to create a new search form is an existing one:
Find and select a search form. Make sure it's not a view. (Here's how to tell the difference.) Search forms are:
• Listed n the Search pull-down menu.
• Listed
in the Search
Templates dialog, accessed by clicking Find
![]() in the toolbar.
in the toolbar.
The search form opens. All search form names start with Find Files; here is an example.
In the Find Files dialog:
The typical search form is a mix of two types of fields:
• Numbered, profile fields - specific to selected profile group(s)
• Other fields (date fields, Doc ID and Text in File fields, for example) which can apply to all documents, regardless of individual document profile.
You can add or remove these general fields as needed. For instructions, see customizing search fields.
The fields and pre-selected codes/field values on the form can vary, depending on how the search form was originally set-up. At least some of these fields - the numbered profile fields - relate to the profile group selection.
Assuming you have access to multiple profile groups, you can select another group (or multiple groups) by clicking Profile Group. That opens the Select Profile Group dialog, where you can choose another. If you do change the profile group, the Find File dialog reloads to display profile fields associated with the chosen group.
Note: With multiple profile groups selected, only shared profile fields appear on the Find Files form. If you want to search for profile field values unique to one profile group, make sure that profile group - and only that one - is selected.
Identify values and/or text for searching.
Customize the search as needed. See Fields on Search forms for details on filling out form fields. Be specific in setting search criteria, but try not to combine too many items together. Here are tips on how to search productively.
Note: You can select multiple field table values, even multiple profile groups for searching. If multiple values for any one field are selected, they combine on an OR basis. (Here's a quick primer on AND, OR and other search commands.)
As you add profile field-related items (numbered fields), Worldox combines them on an AND basis. For example, here the user has identified three search items:

To widen that search, making it less restrictive,
you could combine one or more elements on an OR
basis. Just click the right-side AND
![]() button to change to OR.
button to change to OR.
Note: Variable instructions can be used in numbered profile fields to create views. Views are a specialized type of search, most often set up to run immediately upon selection.
Click Search What to open the Search What dialog, where you can determine the scope of the search within a selected profile group, or elect to search within the visible Worldox worklist or in the Worldox Salvage Bin.
Note: If more than one profile group is selected for the search, the Search What does not appear.
Click
Options ![]() and select Save Template
from the Options menu. That
opens the Save
Find Template dialog.
and select Save Template
from the Options menu. That
opens the Save
Find Template dialog.
In the Save > Find Template dialog:
Enter a descriptive name in the Name of Find Template field. You can click
the down arrow ![]() to the right of the field to select
an existing search template name in the Title dialog, changing it slightly
to create a unique name. Using backslashes
in the form name creates folder levels. For example, entering this name:
to the right of the field to select
an existing search template name in the Title dialog, changing it slightly
to create a unique name. Using backslashes
in the form name creates folder levels. For example, entering this name:
Research\JPA Purchase
creates not only a new form - JPA Purchase - but also a Research folder to contain it. Other forms can then be stored to that folder.
Set how the search will work.
The On Selection choice is pre-set to Show Template. That means you will see this form after selecting it from a menu or list, so search criteria can be adjusted before the search starts. To skip that step, select Perform Search. This means the search runs immediately on selection.
Determine who will see this search form (optional).
Note: Only designated users have access to the Save Template for choice. If you do not have that user entitlement, any search forms created are personal, for Only Me.
This Save Template for choice is preset to Only me. Leave it that way if this is to be a personal bookmark. Or:
• Select Everyone to make this a public, globally-available search form. Or,
• Select the Limited Groups/Users option to customize access. As you do that, additional fields and buttons drop in below. Here are step-by-step-instructions on how to block or allow access for selected groups and users.
In this second Save
Template dialog, select a save Option,
then click ![]() .
.
![]()
Tip:
Once you have one search form open, you can edit any other.
In the Find Files dialog,
click Options |
First, find and open the search form you want to edit. Search forms are:
• Listed n the Search pull-down menu
• Listed
in the Search
Templates dialog, accessed by clicking Find
![]() in the toolbar.
in the toolbar.
Note: Views and some other searches are set up to run immediately upon selection; here are instructions for opening "search immediately on selection" views and forms for editing.
The selected form opens in the Find Files dialog.
In the Find Files dialog:
The typical search form is a mix of two types of fields:
• Numbered, profile fields - specific to selected profile group(s)
• Other fields (date fields, Doc ID and Text in File fields, for example) which can apply to all documents, regardless of individual document profile.
You can add or remove these general fields as needed. For instructions, see customizing search fields.
The fields and pre-selected codes/field values on the form can vary, depending on how the search form was originally set-up. At least some of these fields - the numbered fields - relate to the profile group selection.
Assuming you have access to multiple profile groups, you can select another group (or multiple groups) by clicking Profile Group. That opens the Select Profile Group dialog, where you can choose another. If you do change the profile group, the Find File dialog reloads to display profile fields associated with the chosen group.
Note: With multiple profile groups selected, only shared profile fields appear on the Find Files form. If you want to search for profile field values unique to one profile group, make sure that profile group - and only that one - is selected.
Revise values and/or text for searching.
Customize the search as needed. See Fields on Search forms for details on filling out fields. Be specific in setting search criteria, but try not to combine too many items together. Here are tips on how to search productively.
Note: You can select multiple field table values, even multiple profile groups for searching. If multiple values for any one field are selected, they combine on an OR basis. (Here's a quick primer on AND, OR and other search commands.)
As you add profile field-related items (numbered fields), Worldox combines them on an AND basis. For example, here the user has identified three search items:
To widen that search, making it less restrictive,
you could combine one or more elements on an OR
basis. Just click the right-side AND
![]() button to change it to OR.
button to change it to OR.
Note: Variable instructions can be used in numbered profile fields to create views. Views are a specialized type of search, most often set up to run immediately upon selection.
Click Search What to open the Search What dialog, where you can change the scope of the search within a selected profile group, or elect to search within the visible Worldox worklist or in the Worldox Salvage Bin.
Note: If more than one profile group is selected for the search, the Search What does not appear.
Click Options
![]() and select Save Template
from the Options menu. That
opens the Save
Find Template dialog.
and select Save Template
from the Options menu. That
opens the Save
Find Template dialog.
In the Save > Find Template dialog:
Edit the name in the Name
of Find Template field.
You can click the down arrow ![]() to the right of the field to
select another search template name in the Title dialog, changing it slightly
to create a unique name. Using backslashes in the form name creates folder
levels. For example, entering this name:
to the right of the field to
select another search template name in the Title dialog, changing it slightly
to create a unique name. Using backslashes in the form name creates folder
levels. For example, entering this name:
Research\JPA Purchase
creates not only a new form - JPA Purchase - but also a Research folder to contain it. Other forms can then be added to this folder.
Edit how the search will work (optional)
Change the On Selection choice if necessary. Select Show Template. to have the form open after selecting it from a menu or list, so search criteria can be adjusted before the search starts.
Or, to skip that step, select Perform Search. This means the search runs immediately on selection.
Determine who will see this search form (optional).
Note: Only designated users have access to the Save Template for choice. If you do not have that user entitlement, any search forms created are personal, for Only Me.
This Save Template for choice can be changed as needed.
• Set to Only me if this is to be a personal search form. Or,
• Select Everyone to make this a public, globally-available search form. Or,
• Select the Limited Groups/Users option to customize access. As you do that, additional field and buttons drop in below. Here are step-by-step instructions on how to block or all access for selected groups and users.
In this second Save Template dialog, select a save Option, then click OK.
![]()
"Default" here means the form or view is pre-selected in the Search Templates dialog. To change that default selection:
Click
Find ![]() in the toolbar, or select Find
from the Search pull-down
menu. That opens the Search Templates dialog
in the toolbar, or select Find
from the Search pull-down
menu. That opens the Search Templates dialog
In
the Search Templates dialog,
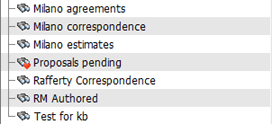
note that one listing is pre-selected and has a small binoculars ![]() icon to the left, as in this example:
icon to the left, as in this example:
That binoculars ![]() symbol indicates this is the default
choice on the list - pre-selected as the dialog opens.
symbol indicates this is the default
choice on the list - pre-selected as the dialog opens.
To change the default choice, right-click any other listed search form or view, then select Set as Default Template.
• If the template selected is public, and you are have manager-level rights, that opens the Set Default Search Template dialog. in that dialog, set the rule as global (for everyone at your site) or personal. Then click OK to save.
• Otherwise
As the Set
Default Search Template dialog closes, you see the binoculars ![]() symbol has moved to the listing just selected.
symbol has moved to the listing just selected.
• Otherwise, you see the binoculars ![]() symbol move to the selected listing, immediately
after selection.
symbol move to the selected listing, immediately
after selection.
![]()
Click
Find ![]() in the toolbar, or select Find
from the Search pull-down
menu. That opens the Search Templates dialog
in the toolbar, or select Find
from the Search pull-down
menu. That opens the Search Templates dialog
In the Search Templates dialog, find the search form or view you want to delete. Select it, then click Delete in the dialog toolbar.
Worldox asks you to confirm your intention to delete this form, in the Template > Delete confirmation message. Click Yes to confirm. As the Template > Delete message closes, the deleted form/view disappears from the Search Templates dialog list.
![]()
A number of Worldox preference settings (11 for Managers, 9 for other users) control various actors in how search operates.
Assuming you have rights to view and edit preferences, here is how you check or change search preference settings:
Select Preferences > Worldox from the Edit pull-down menu. That opens the Edit > Preferences > Worldox dialog, where preferences are organized into categories.
In the Edit > Preferences > Worldox dialog:
Note: This choice may not be available to you. Only Worldox Managers have access to the Everyone tab.
Click The Find Files Options category in the left-side pane to open search preferences in the right-side pane. (Here are descriptions of what those preferences control.)
Note the two columns in that right-side pane - Value and Default. Default lists the starting preference settings. Value shows the current value.
To change a search preference, double-click that listing to open the Change Value dialog.
In the Change Value dialog:
Set or reset the preference.
Most preferences are Yes/No choices:
• Select Yes or No as appropriate.
• Or, if you remember the default value and want to reset the preference to that default, select Rely on Default Setting.
• Other preferences can be numbers or other values. Enter the choice you want, or select it from the drop-down field.
Click OK to make the change.
Changed preferences typically take effect immediately, as soon as the Change Value dialog closes. If you do not see the expected changes, select About Worldox from the Help pull-down menu. When the About dialog appears, press CTRL + D. Then click Close on the Debug dialog. That reloads Worldox configuration files.
![]()