Create a New Quick Profile
Related Topics
Create a new file and save it. Worldox responds by opening a File Save profile form.
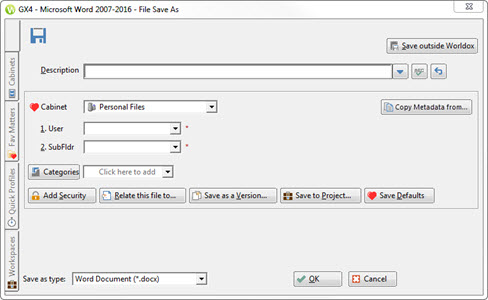
On the File Save form, fill in whatever profile information you want to include in the new quick profile. (The form does not have to be fully filled-out to serve as a quick profile.)
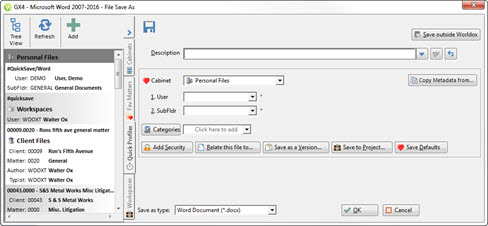
Click the Quick Profiles tab. Click the Tree view  icon or Flat view
  icon to view quick profiles in one of those views.
A sample Flat view is shown below.
A sample tree view is shown below:

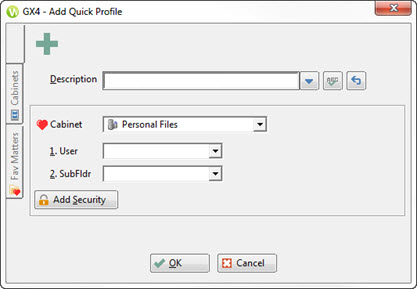
Click the Add ![]() icon to launch the Add Quick Profile dialog.
icon to launch the Add Quick Profile dialog.
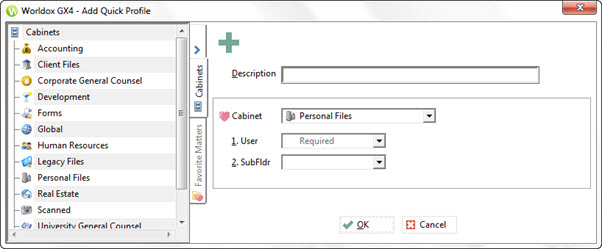
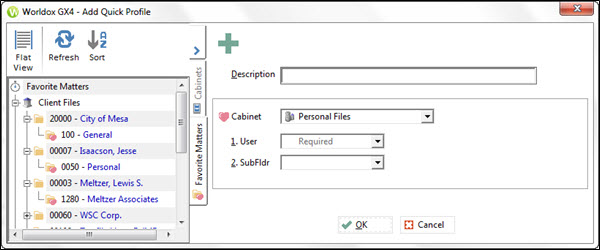
Click either the Cabinets or Favorite Matters tab in the Add Quick Profile form. Sample cabinets in a tree view are displayed below:
Sample Favorite Matters in a tree view are displayed below.
Fill in any required fields and then fill in any other fields you want to include in the Quick Profile. You can include a Description but it is not required and may not make sense in most cases.
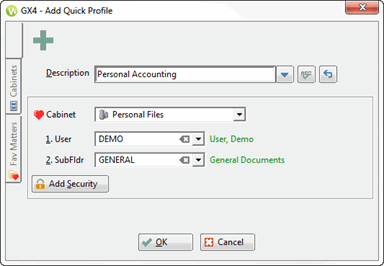
Click OK. The Save Quick Profile dialog appears. The Save as Quick Profile choice is a way to save this completely or partially-completed profile form as a template for use in profiling other documents. You can also create a default quick profile, so that opens profile forms with fields partially or fully filled in which are automatically assigned to the quick profile selected as the default choice. Apply a Quick Profile name if you wish to store as a saved Quick Profile
Enter a Quick Profile Name.
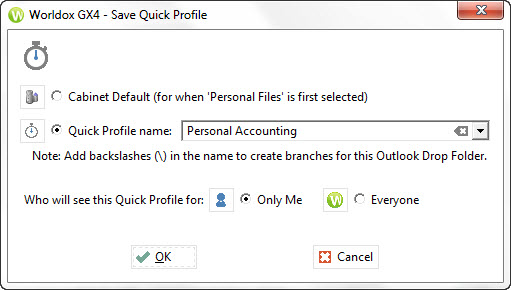
Click OK to close the Save Quick Profile dialog. The new quick profile then appears in the Quick Profiles tab on the left side of the File Save dialog.
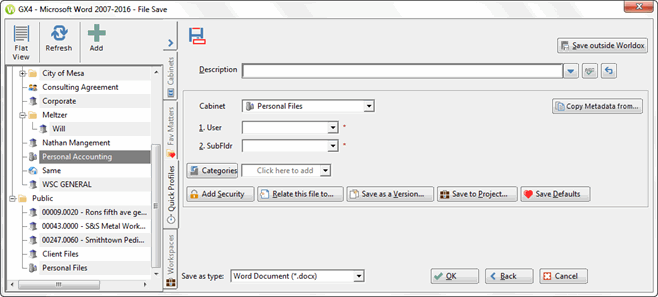
Complete the document profile and click OK or click Cancel to exit the form without saving.