Assign Documents to Categories
Related Topics
Using the Categories from a File list column
Assigning Categories from the Edit menu
Assigning Categories from the File Save or Edit Profile dialog
You can assign documents to categories in few ways:
- By right-clicking in the Categories column on file lists.
- Via the Edit > Assign To Categories choice from the Edit menu.
- At the time of Save or Edit Metadata commands
Using the Categories from a File list column
Make sure the Categories column is visible on the file list. If it is not yet visible, right-click anywhere in the gray space to either side of column headers. Select Insert Column on the right-click menu.
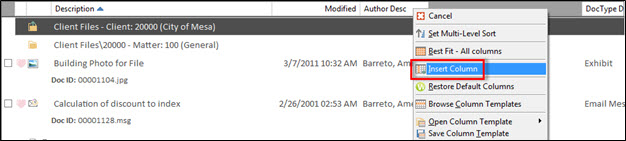
Select Categories from the list of available columns.
That adds the Categories column to the file list. Right-click in the Categories column next to one of the files you are assigning. Click Select Category. Then choose Personal or Folder and pick a category from the cascading menu.

Notes:
You can assign multiple files to categories at one time. If you select more than one, Worldox asks you to confirm your selection in the Clarify Selection dialog.
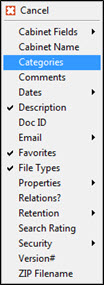
If you do not see the category you want, click Add/Edit Categories on the right-click menu, then create the new category as instructed in Create a new category.
After assignment, the selected category displays next to assigned files in the Categories column.
![]()
Assigning Categories from the Edit menu
With one or more files selected on the file list, select Assign to Categories from the Edit menu.
Next you seethe Edit > Assign to Categories dialog.
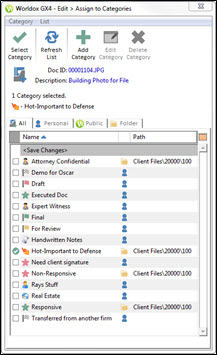
Click the tab (for example, All, Personal, Public or Folder) with the category you want to assign. Then highlight (select) the desired category and click Select in the dialog toolbar.
Tip: If you don't see the category you want, click Add in the Edit > Assign to Categories toolbar and create a new one.
After assignment, the selected category displays next to assigned files in the Categories column.
![]()
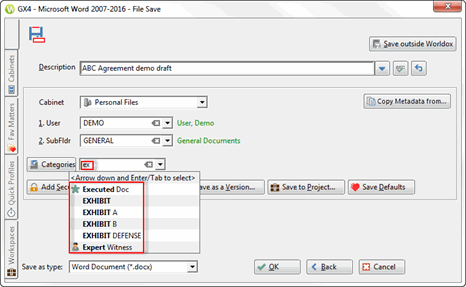
Assigning Categories from the File Save or Edit Profile dialog
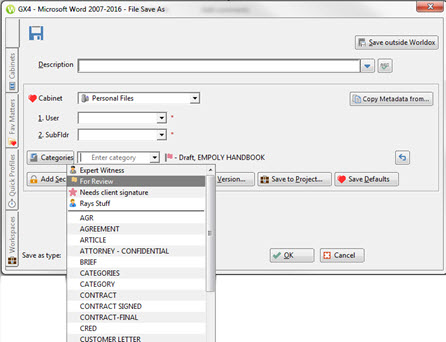
You can assign or edit Categories in the File Save dialog.
In the following example, the arrow next to the Categories field is clicked. You can select a category from the drop-down list.
Or
You can start to type the name of a Category. Any categories with those letters will automatically appear in the drop-down list for quick and easy selection.
You
can click the Undo  button if you want to remove
that category.
button if you want to remove
that category.
The Edit Metadata dialog works in a way that is similar to the File Save dialog.